Creating the good life!
Pool FAQs
We pride ourselves in constructing a quality product and doing so on time. Most likely someone has already given you a general idea of what kind of time frame to expect. When construction time tables go as planned, we always finish on time. We have found that there are two primary reasons for not bringing a construction project in on time. The first is usually the responsibility of the Contractor and it’s called planning. All construction projects are built in layers. Each phase of construction is layered onto the previous phase and so on. It is very difficult and time consuming to have to skip backwards a phase or two to add in something that was overlooked due to poor knowledge or planning. This is where experience counts. Planning and supervision are the fundamentals of excellent construction and we will make every effort to perform in both areas. The second and most common cause of an untimely finish are changes. Every time a change order occurs, we plan on construction taking one week longer. Change orders occur when our homeowners find it necessary to add, subtract or otherwise change the specifications of the job. While we gladly make all changes, we simply want to make you aware of the fact that they will generally cause a delay.
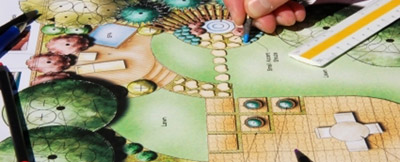
The pool layout is the painted shape and position of the pool that is painted on your ground prior to any work being done. It is used as a guide for excavators when they dig your pool. We ask that you approve the location and the shape of the pool prior to the dig. The layout will often appear much smaller than the finished pool due to it being a flat representation of your pool. We layout the pool 12” larger in every direction. In other words, a pool which will finish 30’ long must be laid out and dug 32’. This allows for 12” thick gunite on the pool walls so the finish will be exact and correct.
A rock excavation is encountered when the machinery, which has been planned for your yard, cannot dig the pool without using special techniques and equipment. The crew, which comes to your house, plans for the best and attempts to dig your pool. However, they may find out rather quickly that their machinery is incapable of the dig. If this happens, the excavators will expose the soil condition by digging a hole and leaving it open. We will then call you to explain the situation and the extra costs involved. A change order will be required but can be done by fax or e-mail. It is impossible to predict in advance if you have the conditions described above. We never mark-up or profit from these additional costs. In fact, we always pay for the costs of stopping & re-tooling and for the 1st hour of hammer time as a courtesy.
In addition to using Schedule 40 PVC (very thick pipe) we keep all plumbing under pressure throughout the construction process. We routinely check these pressure readings to insure that the plumbing is secure. Our plumbers follow a detailed plan for the location of every feature, pool return, and drain. You will notice that pipes are protruding out into the pool. These will remain until removed by the plastering crew after which your pool will be filled. During the plumbing phase the plumber will be digging a lot of trenches. Please avoid any foot traffic, as debris and rocks can be knocked onto piping and break pipes.
If you live in the house, where we are building the pool; we will install the equipment at the time we plumb the pool. If your home is not occupied or is under construction, we will delay the equipment set until you are in the house. The reason for the delay is that until you occupy your home, there isn’t any homeowners insurance to defray the loss, if the equipment is stolen. We should also note, that during this phase of construction, a large load of sand will be dumped somewhere in the front of your lot. The plumbers will be using the sand in their trenches to protect their pipe. It should be gone after the first inspection.
The steel rebar is installed in a grid pattern. Depending on the loads and soil condition, it can be 12" apart, 6" apart, or in rare cases 3" apart. Our civil engineers work out the exact pattern to be used for your pool and this is part of the engineering required for your pool permit and for our structural specifications. The steel is blocked 2-3" off of the floor and walls of the pool. It greatly strengthens the concrete by providing tensile strength. Be careful, the ends of the steel bars & wires used to tie the steel together are very sharp. Please insure the safety of children and pets. A scratch from the steel or tie wire can infect easily and may require a tetanus vaccination.
In most cases, a trench will be dug from your electric panel to the equipment location, if not already done so by the plumbers. Electrical conduit is gray and must be buried 18” underground. It is important to mark any sprinkler lines or other obstructions that must be protected. The conduit must remain uncovered until the inspector has approved it. GFI circuits protect all light and electrical plugs. These are also used near sinks and in bathrooms inside your house. GFI protected circuits instantly trip and shut down when contact is made with water. In addition, all motors and metal within 5’ of the pool are grounded. You may notice a small copper wire attached to metal-framed windows, fences, handrails, and diving boards.
The first inspection occurs just before gunite. The inspectors insure all electrical connections and work is properly completed. They also review the pool’s structural engineering and steelwork. They do not inspect the shape of the pool or pool depth, as these are not safety or code issues. They will check the pool’s location to ensure that it is out of all setbacks and easements. Typically, inspections are completed quickly and we have very few problems, if any, with inspections. In some cases, inspectors will ask to see more engineering verifications. We provide this at our expense. While the delay can be frustrating, it is better to be safe now than sorry later. This is a good time to mention a few things about inspections. Failing an inspection does not mean we have done something wrong.
There are 5 municipalities in Clark County and all have different ways of doing things. Individual inspectors have things they will ask for that other inspectors will not. Rest assured, we try our best to anticipate the inspector’s requirements. But occasionally, an inspector will fail the inspection. As quickly as possible, we will rectify the issue and request a re-inspection for the next day.
The pool really begins to take shape when gunite is placed. This is a good day to call off work or go in late. Steps and benches are formed, spas take shape, and the pool begins to look like a pool. Gunite (premixed concrete) is sprayed into your pool through a hose under pressure. It's noisy, messy, surprisingly artistic, and fun to watch. A curtain is put up around the pool to block overspray from getting on your house. Gunite dries and gets hard very quickly. As a matter of fact, it can dry too quickly. It is necessary for you to begin to water cure your gunite to slow the drying time down. Start water curing on the 1st day after the gunite has been installed.
Do not water the same day it was installed. In the summer, wet the pool down at least 5 times a day, more if you can get to it. In the cooler months (temperatures below 80 degrees F), 2 to 3 times a day is fine. Spray water on the sides until it starts to "Sheet" off. Then move on to another part of the pool. It takes about 10 to 15 minutes to complete a pool watering. Don't worry; you can't over water a pool. A puddle will accumulate in the bottom of the pool, that's ok; we will pump it out later. You will notice cracks forming in the pool, particularly in the floor. This is normal, these are shrinkage cracks and do not affect the structural integrity of the pool. The gunite shell needs to cure for 3-4 days before we can proceed with construction.
We must have all rockwork, if there are boulders and waterfalls to be done on your pool completed prior to the deck. This is also a good time to install any masonry such as barbeques, fire pits, benches, and equipment walls. Any gas lines, landscape sprinkler and drip lines, and landscape lighting lines that are to be run under the deck should be in before we form for deck. This is the time to review and make sure that your deck has the shape that you want. Extra costs will almost always result if you decide to change the deck after it has been formed.
Here's where the pool starts to look pretty. We always find that once the deck gets started, our customers get very excited and start planning their first pool party. Be patient, the process is almost complete. The deck crew will come out and put up forms (thin strips of wood) outlining the deck. You will see where any steps and drains go. You must approve these forms prior to the pouring of deck. Once the deck is poured, cannot be changed. It's a good idea to double check the color and texture you have chosen to make sure it is still your favorite. The concrete for the deck will be poured into the forms. If you have chosen Spray Deck, it will be applied when the concrete is dry enough to let it stick. Other types of toppings and deck, such as stamped concrete, flagstone, tiles, or cultured stone have their own requirements. Regardless of what kind of deck you have; stop water curing your pool, do not walk on or get water on the deck, and do not cover the deck with anything for at least 48 hours. Concrete does not dry evenly so it will appear darker in some places and lighter in others. Don't worry; it will reach a consistent hue after it through a full summer's heat.
Access walls & gates (gates must be self-closing) are done at this time. Types of barriers required (items, as defined by your city/county, which restrict access to the pool) can differ depending on the city you live in. The pool cannot be finished until your city is satisfied all required barriers are in place and functioning. Be sure to remember that the wall height required by your city code is measured from the outside of the wall. Occasionally, a neighbor will have piled dirt or built a planter against his/her side of the wall. If the inspector sees this, the final inspection will not be approved until the situation has been remedied. If it happens to you, don’t panic. There are always ways to work out a solution. This is also the time when we must install your door alarms (if appropriate). We will need access to the inside of house for this, so expect a call so we can coordinate with you.
We would like your help in policing any personal trash. It is absolutely our policy that gum wrappers, drink cups, lunch sacks etc. never be left on your property. However, we find that our crews are human and take constant reminding. We consider it to be a great help if you would let us know at any time you see trash of this kind left in your yard. By staying on top of this problem together, we can keep it to a minimum! (The unavoidable construction mess gets cleaned up prior to the pool being finished.) Trenches are filled, and all construction debris is removed. Landscaping and/or access area repair is not provided unless it was part of your pool contract.
We will call the city/county for a pre-plaster inspection. This is where the city checks that all of your barriers are to code. Types of barriers required can differ depending on the city you live in. We cannot schedule a specific time for an inspection, nor will the city agree to a specific inspection time. We can advise you of barrier code requirements if you are installing them yourself.
At last! Seemed like forever huh? All interior finishes are pumped into the pool from the street.
Plaster will be applied and the plasterers will start your hose going to fill the pool as soon as they are done. Do not turn off the water until your pool is full! Let the pool fill all of the way up until it reaches the middle of your tile, then turn the water off. It is important that you do not turn the pool/spa light on until the water has covered the light fixture. Follow the plaster care instructions given to you for your spa first, then your pool. The plaster may appear a little mottled because the plaster does not dry evenly (yes, it really does dry under water). Some parts stay wet longer and so, appear darker. Begin brushing the plaster the day after it is installed. The more you brush during the first week, the smoother it will be.
At startup we turn the pool on, check out the system to make sure everything is working properly and then tell you everything you wanted to know about a pool and probably some stuff you were not sure you wanted to know. Plus, we show you how to work the pump, filter, light and the rest of the equipment. It’s a lot of stuff to know. Video cameras are permitted and encouraged. You can request a re-instruction at no charge. We recommend you wait about a week before requesting a re-instruction. By then, you will have specific questions that can be addressed. We do teach you a simple and proven method for pool water care. There will be written instructions for this part so you can refer to them.
As soon as your start up is complete. Go have fun and thanks for choosing Courtney Landscape & Pools!
About Us
Courtney Landscape & Pools does it all. We handle everything outside the walls of the building! Design services for your family and lifestyle, pool designs to ease your mind and soul, and we even maintain your outdoor environment.
Recent Posts
Courtney Landscape & Pools Blog
Topics that will be covered


Courtney Landscape & Pools
1969 Whitney Mesa Drive
Henderson, NV 89014
7:00 a.m. - 4:00 p.m. M-F
(702) 435-5799
License Information
A-10E License Number: #67883
Bid Limit: $80,000
C-10 License Number: #55372
Bid Limit: $80,000
C-5 License Number: #79298
Bid Limit: $45,000
C-18 License Number: #79297
Bid Limit: $25,000


